I have strange dreams. I often awake with new ideas on something that I am working on, which really isn’t all that strange, but when I try to explain my dreams to my wife, well…. they’re strange.
Yesterday morning I woke up thinking about other things I could do with the DG5 shield, and one of the things I dreamed about was making VFO drift measurements. Using the DG5 emulator and the USB communications with the computer, I could log the calculated VFO frequency over time, and see how my VFO drifted during warmup. This was pretty straight forward, instead of scanning thru three frequencies to measure, I just locked the board to the VFO and increased the gate time to 1 second, and took a measurement every 6 seconds. I printed these results to the serial port and captured them with my computer.
Now, there’s another source of drift in this setup, and that’s the crystal oscillator on the Arduino itself. The crystal’s I have used for other ATMega328 based project boards are rated at 20ppm at 16Mhz – the clock frequency the Arduino uses. 20ppm works out to be +/- 320 Hz = quite a bit of potential measurement error! But crystals don’t usually drift all over the place in short periods of time, with relativity stable temperatures. I had the Arduino and the shield powered up overnight with the TS-520S off, so I figured it would be pretty stable for a measurement of the TS-520S VFO drift during warm-up.
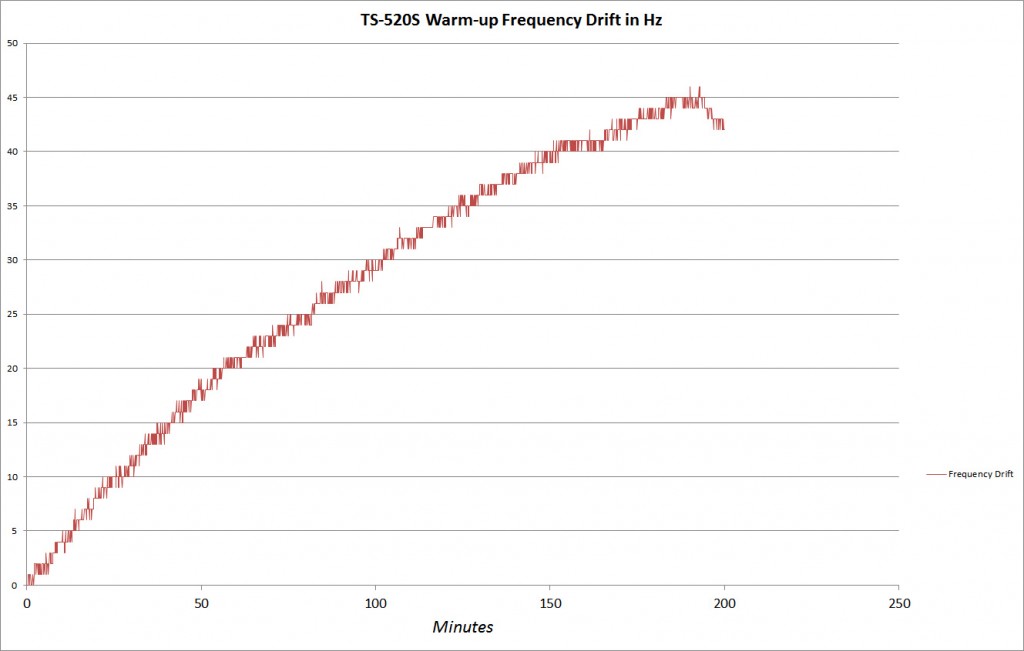
Here’s the drift plot over about 3 hours of warmup. I suspect most of the calculated drift is the TS-520S VFO, and not the Arduino. But we can actually eliminate the Arduino’s error using one of the DG5’s other inputs.
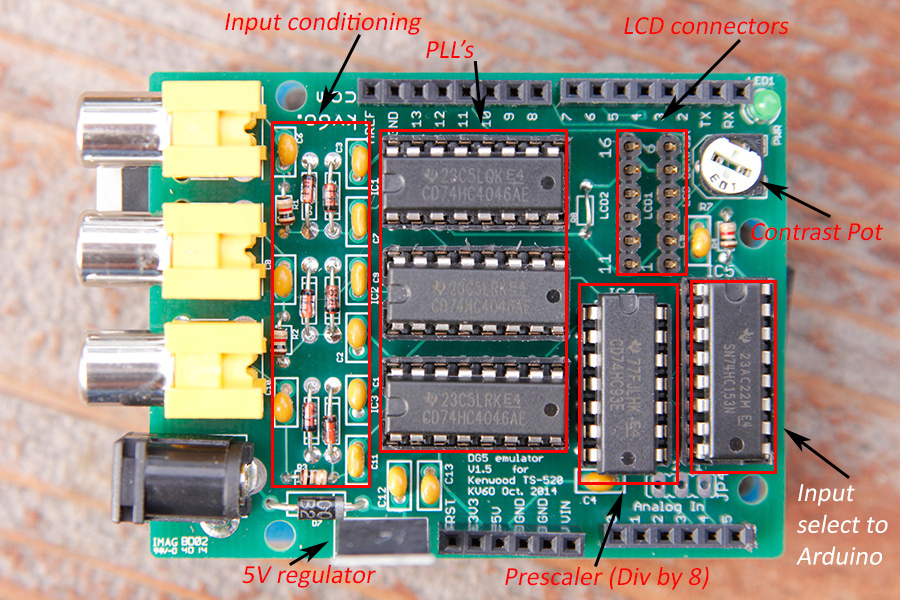
By using an external frequency reference, we can eliminate the Arduino as a source of the error. The DG5 emulater can select from 3 inputs for measuring (2 direct, 1 prescaled by a divide by 8 counter), so I used my HP 8924C as an external frequency reference. It uses an OCXO (Oven Controlled Crystal Oscillator) for it’s frequency source, which is much better than the $0.39 Arduino crystal. I don’t have the spec’s in front of me, but if I remember correctly, it’s something like 0.05 ppm or better. I have used it to obtain sub 1 Hz measurements in the ARRL Frequency Measurement Test (http://www.b4h.net/fmt/fmtresults201404.php), so it’s pretty good at these frequencies.
This time I had the program select the VFO input, make a measurement, then select the external frequency reference (which was set to 5.000000 Mhz) , and make another measurement, Since we know the input frequency is 5.000000 Mhz we can calculate the error, then apply that error to the measured VFO frequency. The data of the Arduino looks like this:
VFO,REF,ERROR,FREQUENCY,Millis
5000064,4999944,-56,5000008,10043
5000064,4999945,-55,5000009,15044
5000064,4999944,-56,5000008,20045
5000064,4999945,-55,5000009,25046
5000064,4999944,-56,5000008,30047
5000065,4999945,-55,5000010,35048
5000064,4999945,-55,5000009,40049
5000064,4999945,-55,5000009,45050
5000064,4999944,-56,5000008,50051
5000064,4999945,-55,5000009,55052
5000064,4999944,-56,5000008,60053
5000064,4999945,-55,5000009,65054
That’s the fist minute or so of data out of the Arduino. The columns are VFO (the raw measured frequency), the Ref (the 5 Mhz reference frequency as measured by the Arduino), The calculated error (REF – 5,000,000), the corrected VFO frequency (Measured VFO + ERROR), and lastly the millis() function out of the Arduino which gives us the Millis counter value – how many milliseconds we’ve been running.
Put this in to Excel, and we get this:

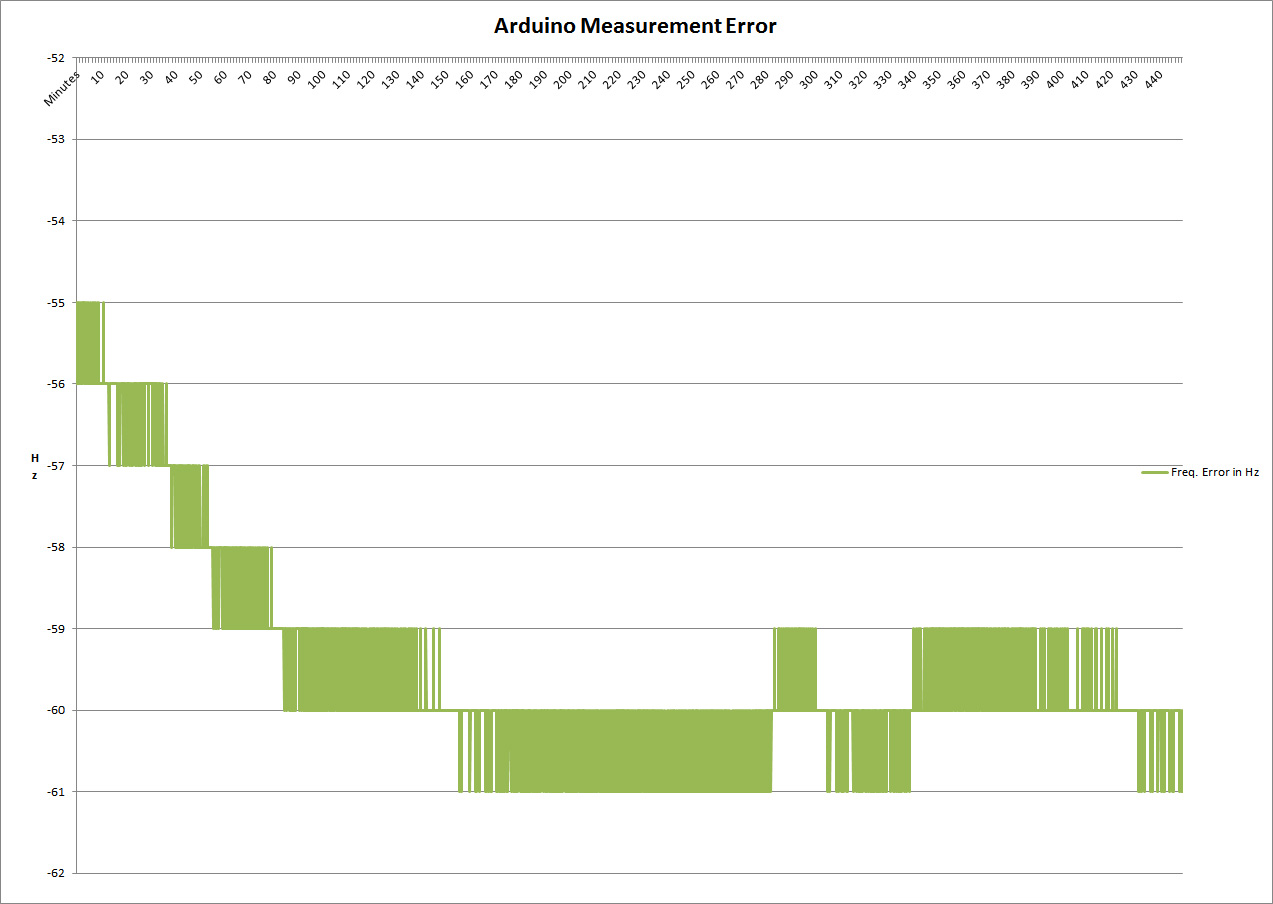
Here’s the calculated error in Hz over about 7 1/2 hours (I left it running overnight). Looks like the Arduino is -59.512 Hz low on average, but drifted only about 5Hz during the test. Not bad, and perhaps I should add a frequency error compensation factor in the DG5 code.
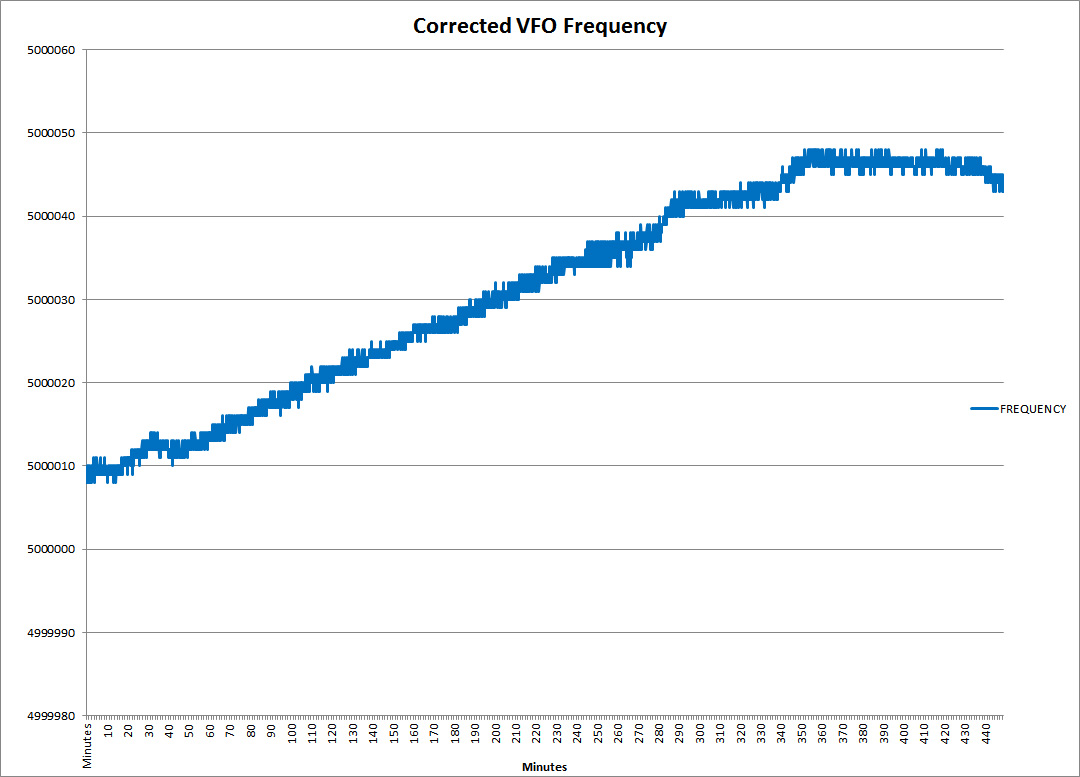
Here’s the corrected VFO drift over 7 1/2 hours:
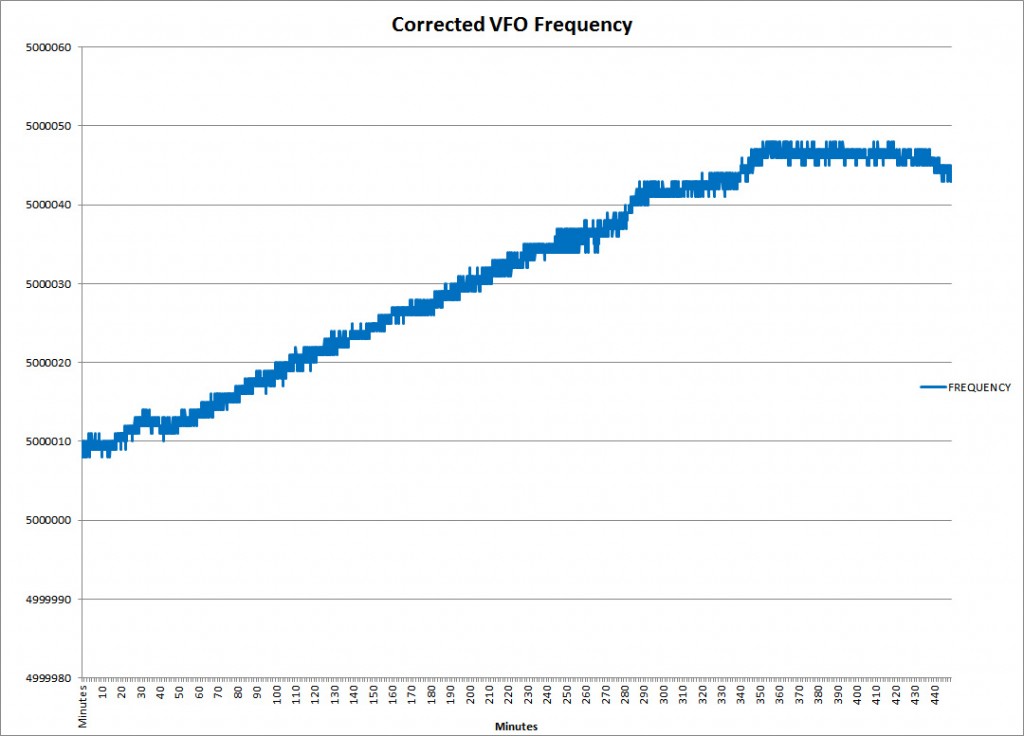
Even after running all day, the TS-520S’s VFO continues to drift appreciably – about 40Hz over this time frame. No big deal – it’s amazingly stable for the technology – but it’s sure nice to be able to characterize it!
Points learned:
- It looks like the Arduino frequency stability is about 10x better than the TS-520’s VFO in this setup, which is good since we’re looking to the Arduino to measure the VFO.
- I have only measured the VFO so far, I’ll probably do a similar exercise with the BFO (which mixes with the VFO to obtain the IF frequency) and the Hetrodyne oscillator (HET) to see how stable they are.
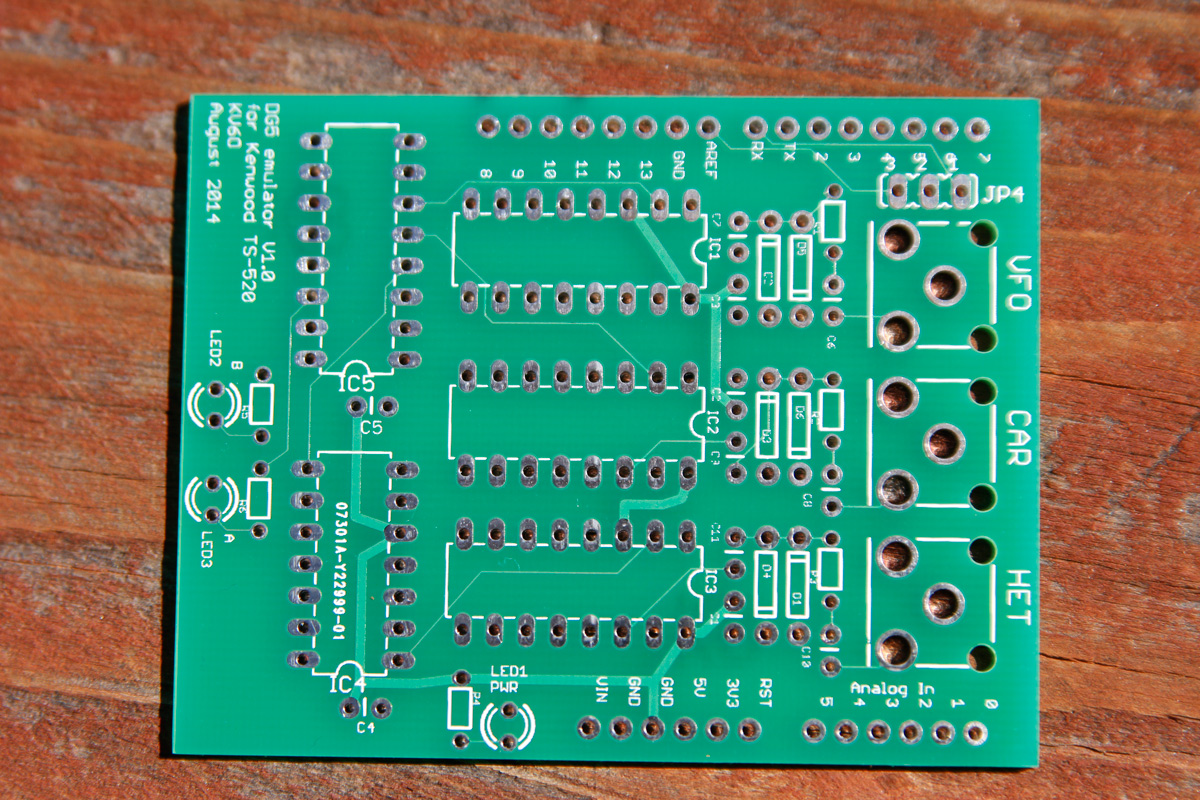
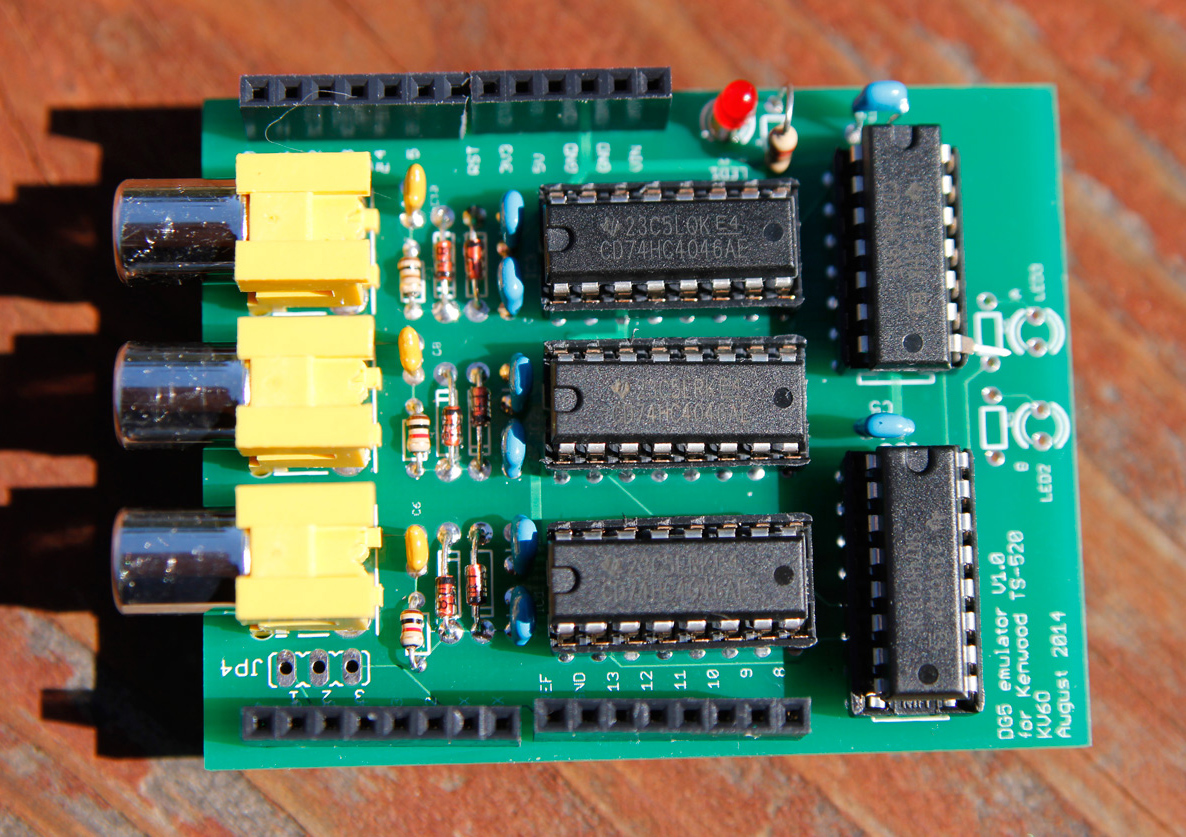
The DG5 shield can be a useful tool as well as a frequency display!
Steve